Objectives
- Understanding how to design using a brief.
- Develop an individualised specification
- Understand some commercial practices
- Research a design style shape and form
- Understand sustainability and moral, cultural issues
Homework Tasks:
Assessment Task:
Present information on the following topics in a creative way as part of your own research: What do the 6R's in sustainability stand for and what does this mean for your product?
Independent Learning task:
Assessment Task:
Present information on the following topics in a creative way as part of your own research: What do the 6R's in sustainability stand for and what does this mean for your product?
Independent Learning task:
- Watch the following video (below) and write 5 acts about Alessi. Collect a paper coffee cup to use to find dimensions.
- Bring materials for your project that will support your design
- Take a photo of your final product to print and paste in your book.
Lesson 1 of 7

Brief:
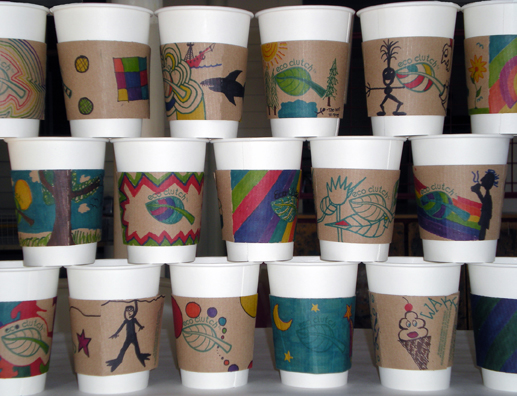
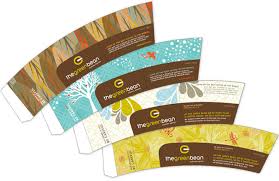
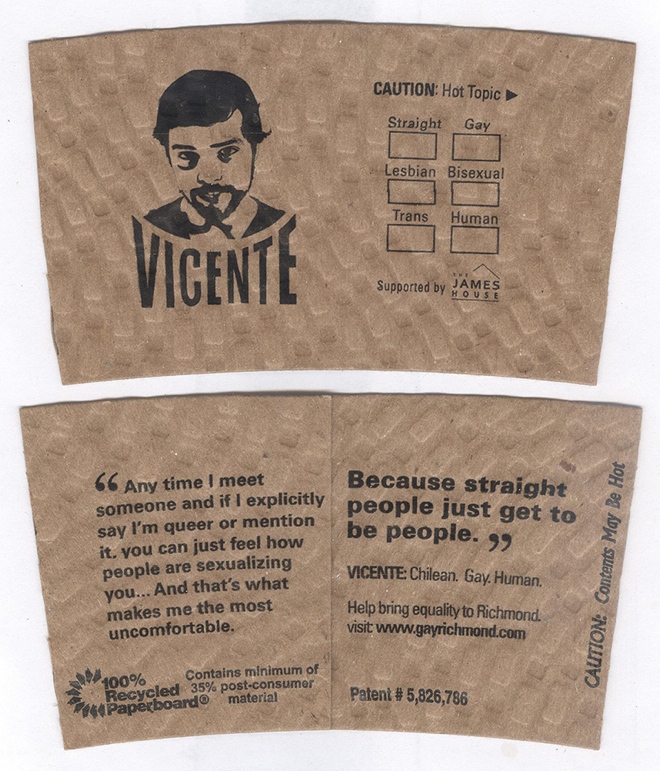
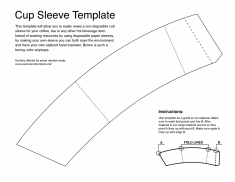
Design and make a prototype cup sleeve for a new coffe shop to use to disguise the plain paper coffee cup. Do this by using a variety of creative graphical techniques and styles of typography. Consider commercial practices and manufacturing techniques incorporating the Allessi design style.
Design and make a prototype cup sleeve for a new coffe shop to use to disguise the plain paper coffee cup. Do this by using a variety of creative graphical techniques and styles of typography. Consider commercial practices and manufacturing techniques incorporating the Allessi design style.

|
Task Analysis:
|
Situation:
Use you analysis and write a description of:
Use you analysis and write a description of:
- What the product could, must or should look like when finished.
- What you aim to do and why you need to do this.
- What does the client expect from you and how will you achieve this.
- What materials could be used and how you would source it in bulk.
- What moral, social and environmental issues you must consider when developing your product.
- What strategies you would use to "sell" the product to the client. (Dragons Den!)
Lesson 2 of 7
Look at the picture below and above to identify some of the information that appears on packaging. Better even if you find your own packaging to analyse!
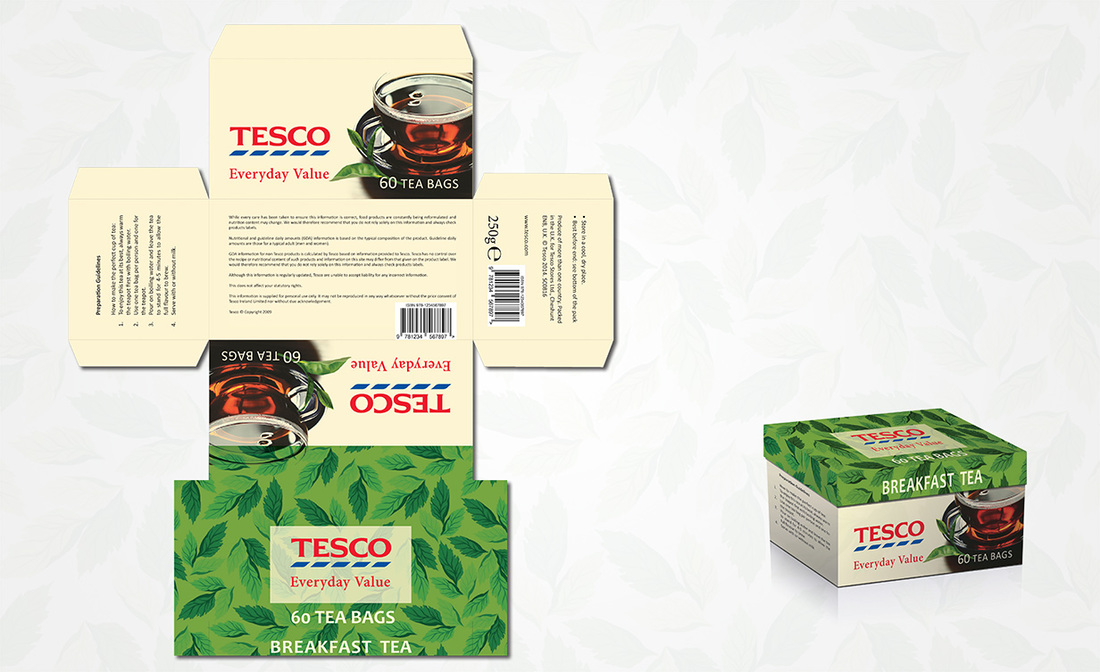
Identify: Barcode, Mass, Instructions, Content, Product picture. Where is the recycling symbol, Keep Britain tidy?
On the blank page of your book:
Map what information must appear on the sleeve. Remember that the law requires you to display some information.
Map what information must appear on the sleeve. Remember that the law requires you to display some information.
On the lined page of your book:
Write at least 15 specification points for your product and make sure you explain each point clearly.
Write at least 15 specification points for your product and make sure you explain each point clearly.
- The colours blue, brown and pink must be used in the design because they are the corporate colours of the coffee house/shop.
Lesson 3 of 7
Concept Ideas:
* Draw 4 different concept ideas for your sleeve design on the blank page of your book. Remember to read your SPECIFICATION again BEFORE starting your designs. Render and annotate each idea carefully.
* Evaluate two of your best ideas by writing three good points for EACH idea. Write down two points for improvement for each of your chosen ideas.
* Ask a friend to write a short evaluation of the idea they like best!
Lesson 4 of 7
Developing Ideas:
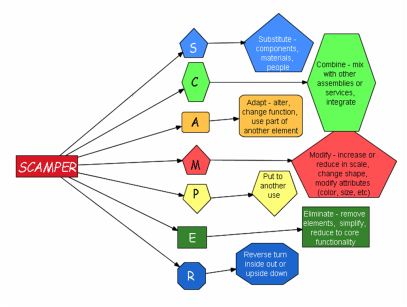
Look at your previous ideas in your concept ideas. Develop your ideas by drawing a new idea using information from idea 1 and idea 3 on the blank page of your book. (You must be able to see detail from the two ideas combined into an new idea.) You can use SCAMPER to help.
Do the same with ideas 2 and 4.
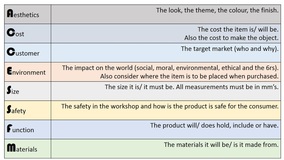 ACCESS FM
Evaluate your ideas on the lined page by:
Evaluate the first idea by thinking of
AESTHETICS SIZE and FUNCTION
Evaluate your second idea by thinking of
MATERIALS and SAFETY
Evaluate the first idea by thinking of
AESTHETICS SIZE and FUNCTION
Evaluate your second idea by thinking of
MATERIALS and SAFETY
Lesson 5 and 6 of 7
Final idea and manufacture
On the blank page of your book:
Look at your previous ideas and then draw your final idea. This must be annotated and rendered thoroughly. When satisfied, use PHOTOSHOP to do your final design. Print it off and test it on your cup.
On the lined page of your book:
On the blank page of your book:
Look at your previous ideas and then draw your final idea. This must be annotated and rendered thoroughly. When satisfied, use PHOTOSHOP to do your final design. Print it off and test it on your cup.
On the lined page of your book:
- Write down which specification points have been met by your design and how.
- Write down which points have NOT been met and why?
Lesson 7 of 7

Evaluation Questionnaire
On the lined page of your book, write down ten questions that will help you to find out if your product is a success and why it would be used.
Write answers for your questions by surveying 5 people.
Write a conclusion of what you have learnt from the questionnaire.
On the lined page of your book, write down ten questions that will help you to find out if your product is a success and why it would be used.
Write answers for your questions by surveying 5 people.
Write a conclusion of what you have learnt from the questionnaire.
Paste a photo of your product on the blank page
